Send Message to Discord/Slack Using Aws Lambda
Bài này hướng dẫn tạo 1 function lambda start EC2 và gửi message về Discord/Slack.
Table of Contents
Bài này hướng dẫn tạo 1 function lambda start EC2 và gửi message về Discord/Slack.
Ngoài ra, dựa vào đó, các bạn có thể setting Cloudwatch rule để trigger Lambda function theo 1 Schedule mong muốn.
I. Discord
1. Yêu cầu
Đang sử dụng hệ điều hành Window (MacOS cũng được, nhưng các bạn sẽ cần hiểu dc chỗ nào nên làm theo/ko làm theo)
2. Cách làm
2.1. Tạo bot trên discord
Vào discord tạo server “Test”
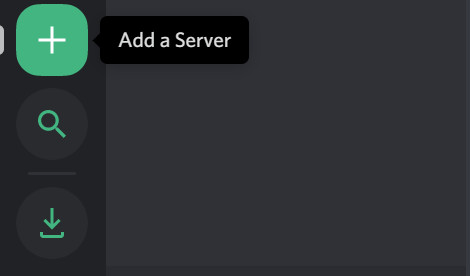
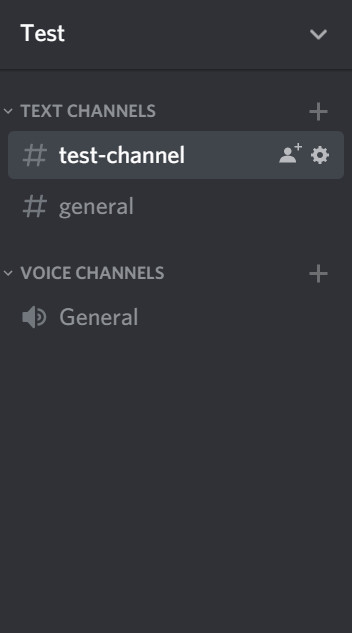
Trong server đó, tạo channel “test-channel”
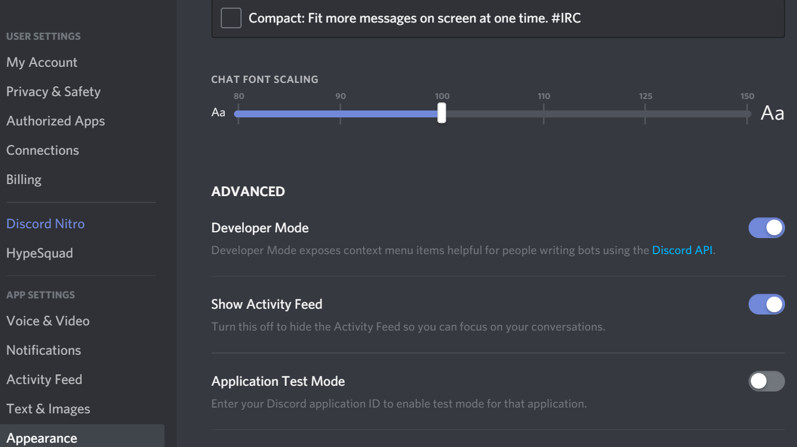
Vào User setting bật Developer Mode
Quay lại channel “test-channel” chuột phải để lấy channel ID
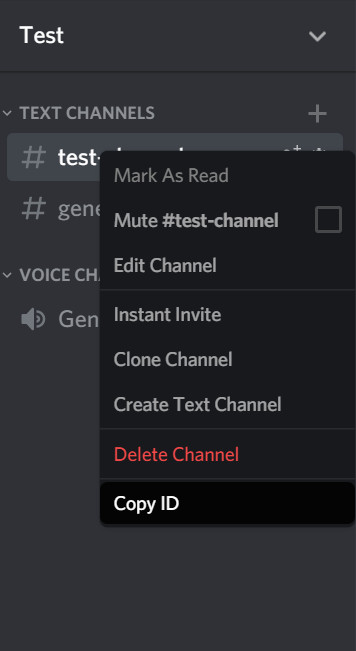
Lưu lại Channel Id: 61623232544545162 để lát nữa dùng.
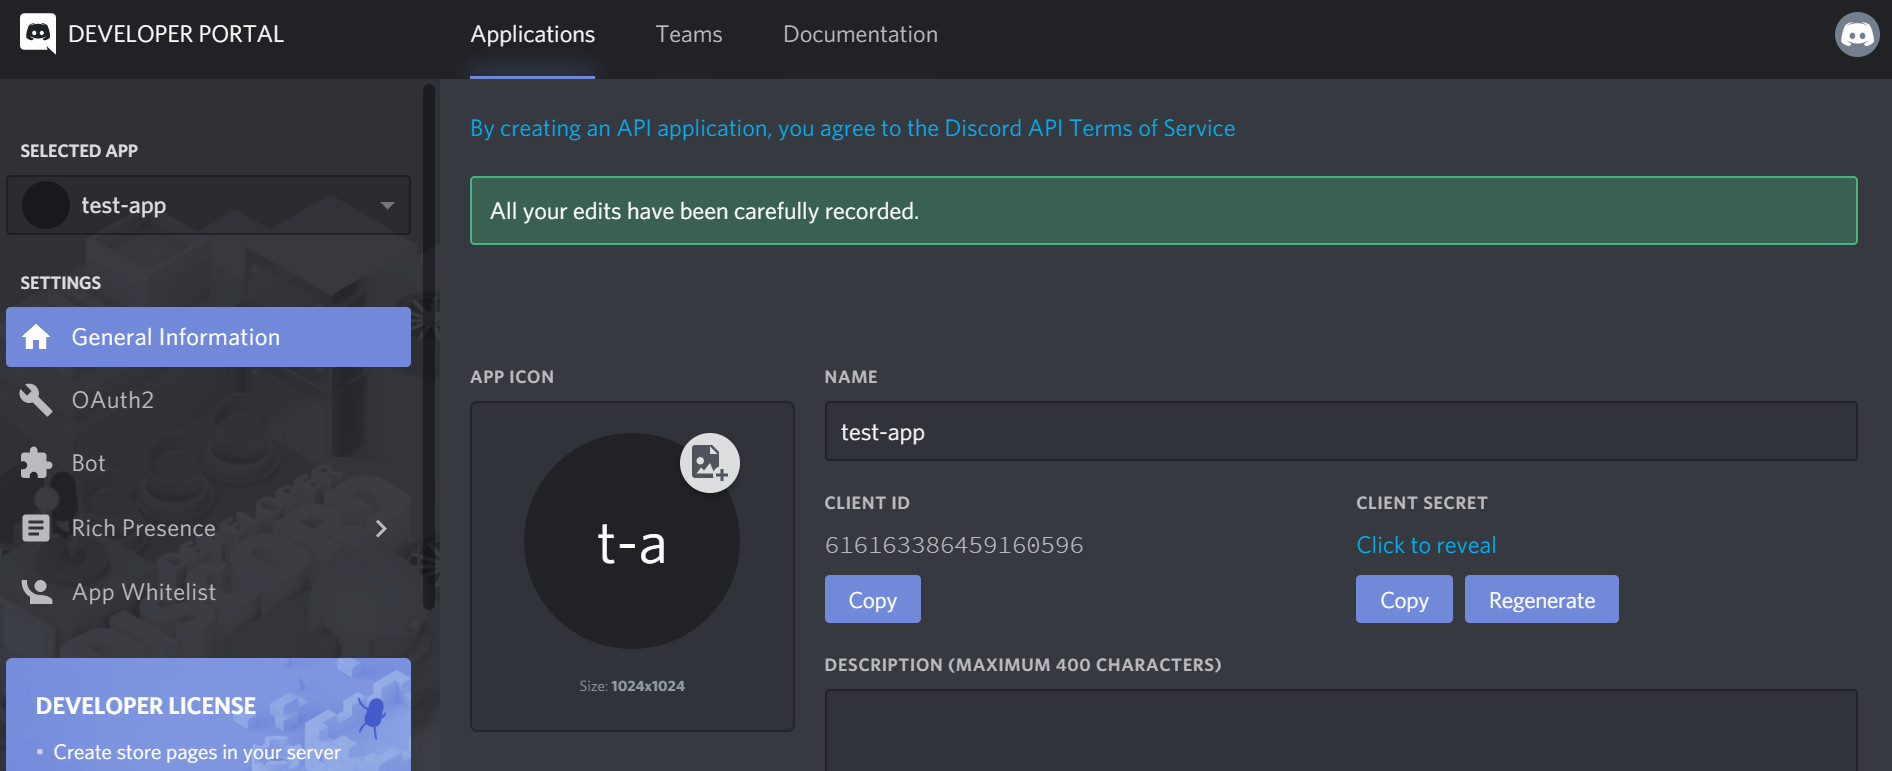
Vào link sau: https://discordapp.com/developers/applications/
Chọn “New Application”
đặt tên cho app: “test-app”
Vào tab BOT, chọn “Add Bot”
đặt tên cho bot: “test-bot”
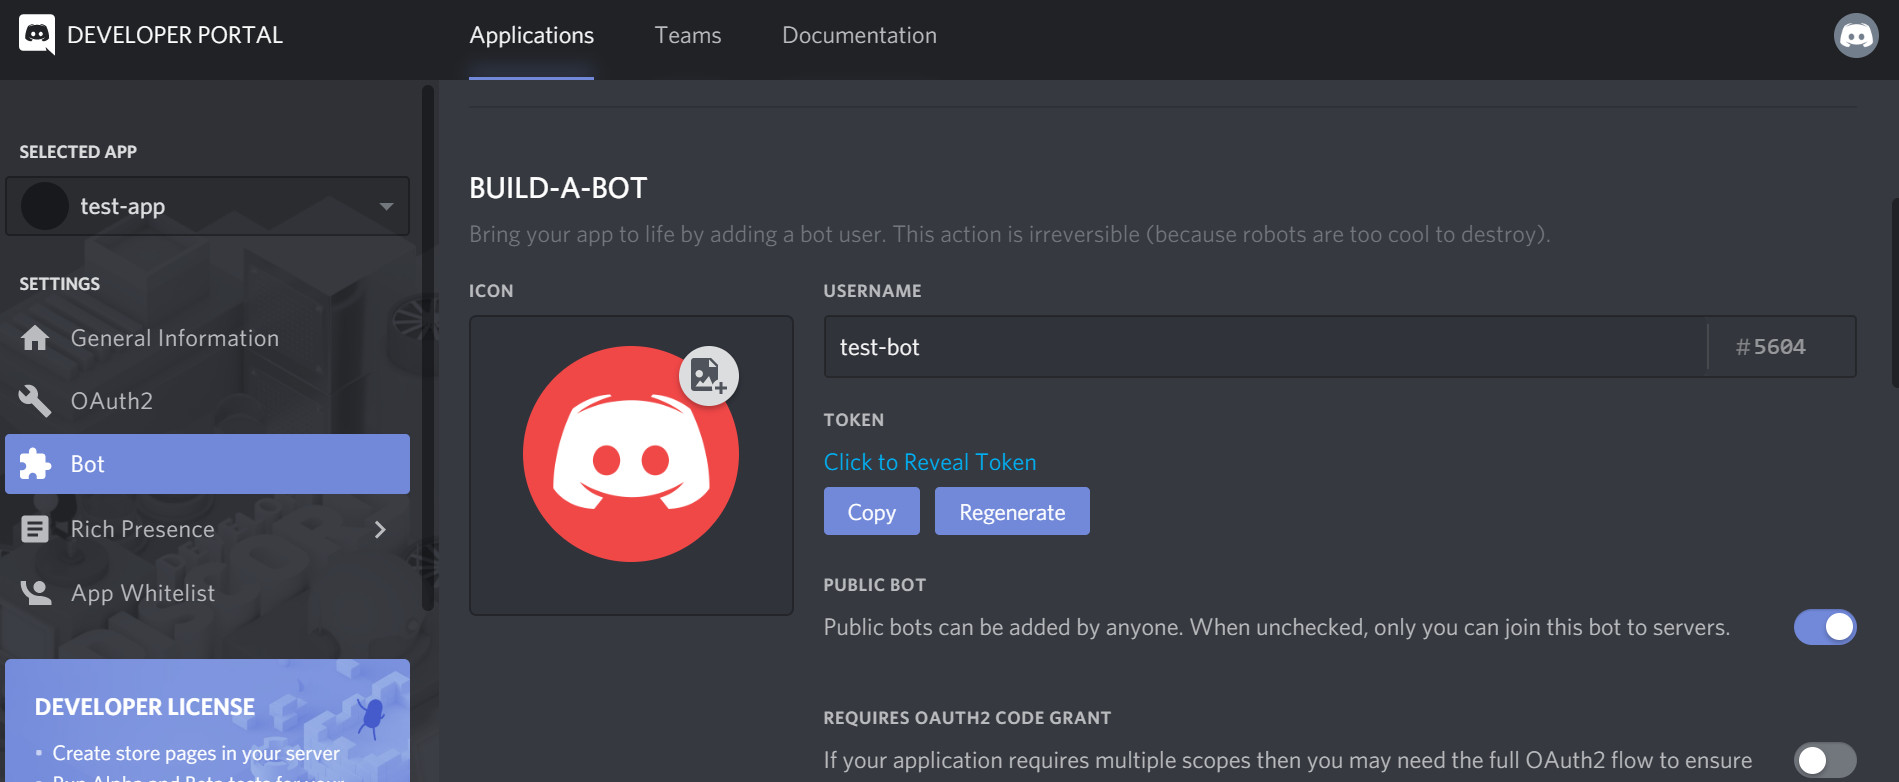
lưu lại TOKEN của BOT: NjEASSSSMzg2QRUFDJSHFJD.XAGGGGQ.BHASSSSFFFFlas4FucsS8M để lát nữa dùng.
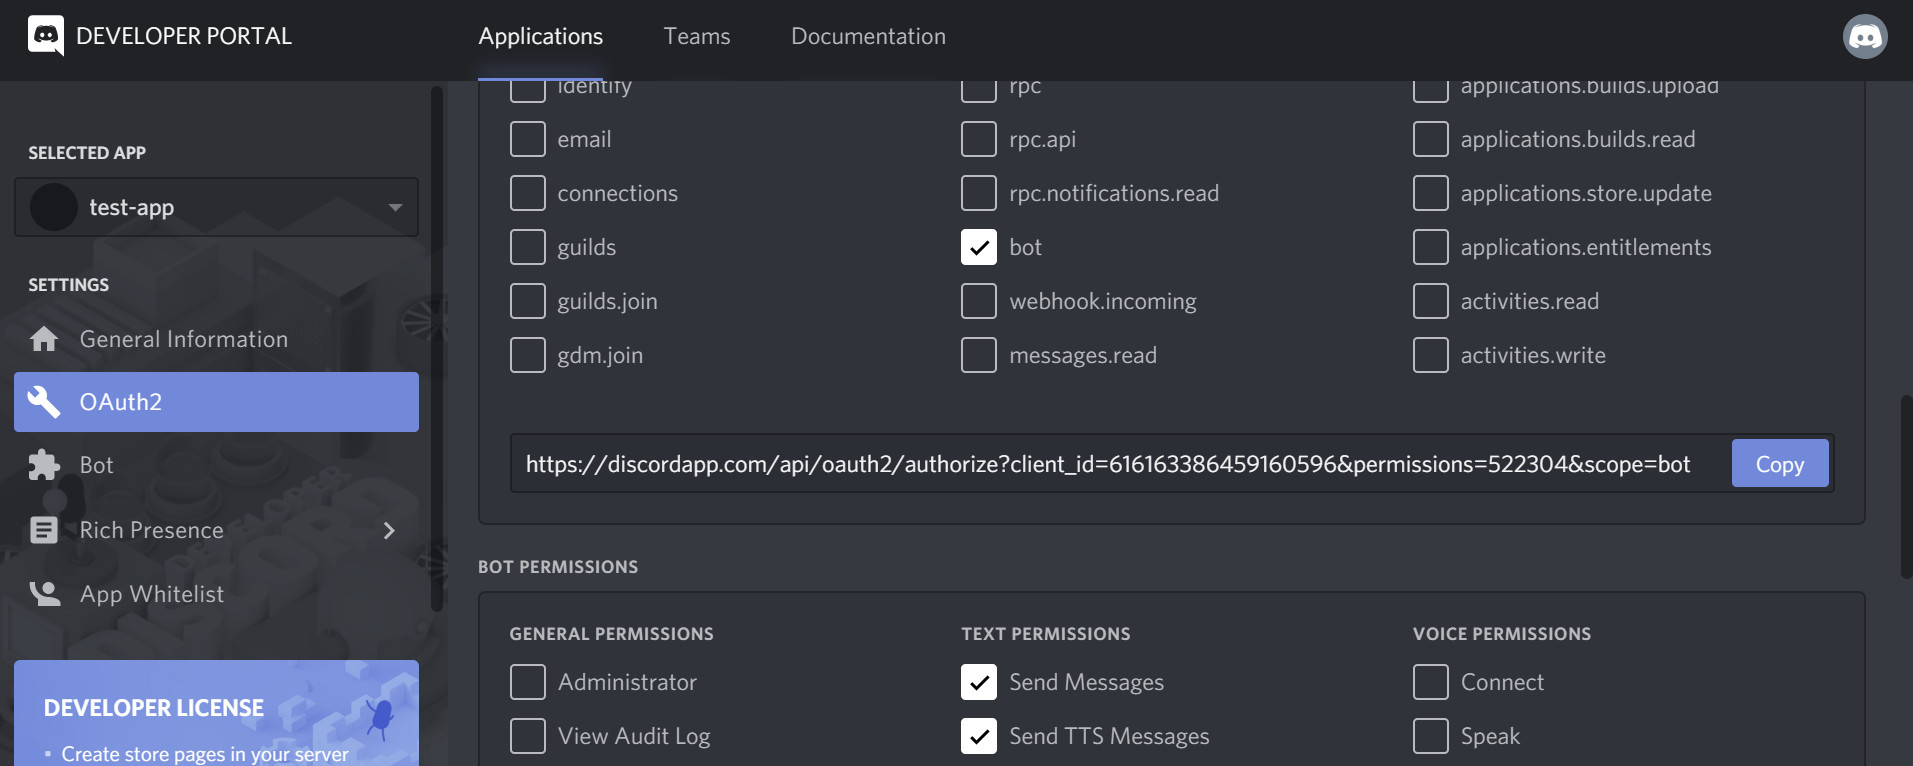
Vào tab “OAuth2”, chọn Scope là “bot”, chọn Permission bằng cách select all option cột “Text permission”
copy URL của Bot ra: https://discordapp.com/api/oauth2/authorize?client_id=616163386459160596&permissions=522304&scope=bot
Dùng URL đó paste vào trình duyệt Chrome chẳng hạn
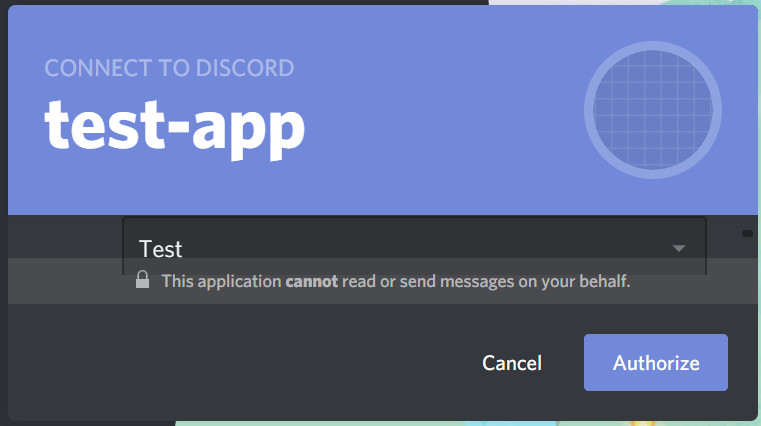
Chọn server Test mình đã tạo, ấn Authorize
Dấu tích xanh hiện ra là ok

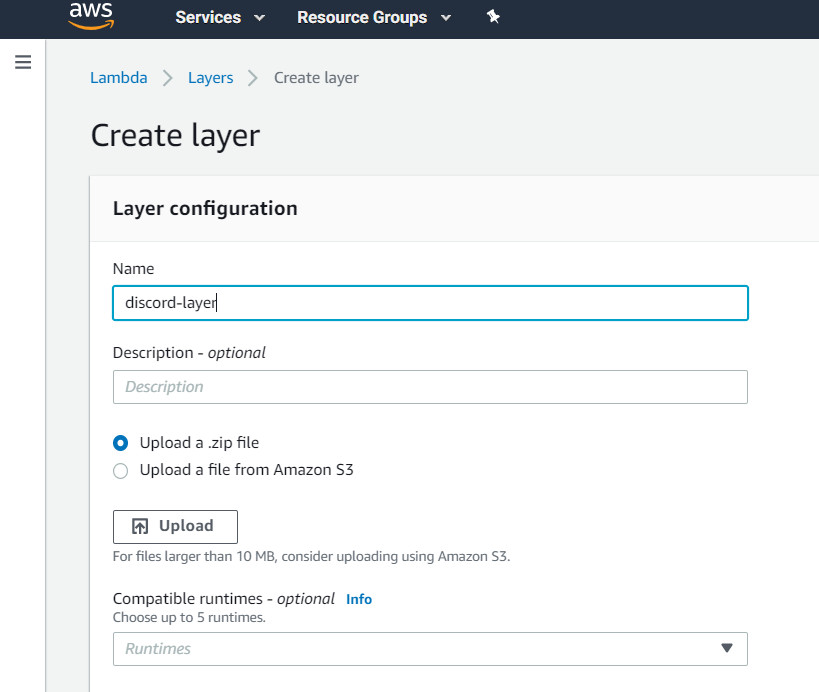
2.2. Tạo AWS Lambda layer “discord-layer”
Launch 1 EC2 Amazon linux, SSH vào, run các command sau:
sudo yum install python36 python36-pip -y
mkdir ~/schedule-start-ec2
cd  ~/schedule-start-ec2
sudo python3 -m pip install --target ./package/python discord.py==0.16.12
cd package/
zip -r9 ${OLDPWD}/layer.zip .
Dùng winSCP lấy file layer.zip ra
Vào AWS Lambda, tạo 1 layer để sử dụng thư viện discord
tên layer: “discord-layer”, upload file “layer.zip” vừa tạo ở trên
2.3. Tạo AWS Lambda Function
Vào AWS Lambda, tạo function schedule-start-ec2
Chú ý chọn python 3.6 nhé (vì bài này mình sử dụng 3.6 và chưa test các version khác)
Add layer “discord-layer” mà mình vừa tạo vào
Layer của bạn có dạng arn:aws:lambda:us-east-1:973219233233:layer:discord-layer:1
Thời gian Timeout của Lambda nên set là 10s
Nhớ chọn role để Lambda có thể start EC2
Nội dung function như sau: (Chú ý bạn cần sửa phần # Your personal info)
import boto3, logging, os
from botocore.exceptions import ClientError
import discord

"""
Start a specific instance
"""

# Logger settings - CloudWatch
# Set level to DEBUG for debugging, INFO for general usage.
logger = logging.getLogger()
logger.setLevel(logging.INFO)

# Your personal info
region = "us-east-1"
ec2_id = "i-00019a293857hfdk8a"
TOKEN = "NjEASSSSMzg2QRUFDJSHFJD.XAGGGGQ.BHASSSSFFFFlas4FucsS8M"
channel_id_number = "61623232544545162"

# Define Discord bot client
client = discord.Client()


def start_ec2_command(region, ec2_id):
    """
    Tries to Start EC2. If a ThrottlingException is encountered
    recursively calls itself until success.
    """
    try:
        ec2 = boto3.client('ec2', region)
        # start ec2
        ec2.start_instances(InstanceIds=[ec2_id])
        return True
    except ClientError as err:
        if 'ThrottlingException' in str(err):
            logger.info("Start Ec2 command throttled, automatically retrying...")
            start_ec2_command(region, ec2_id)
        else:
            logger.error("Start Ec2 command Failed!\n%s", str(err))
            return False
    except:
        raise

@client.event
async def on_ready():
    print('Logged in as %s' % client.user.name)
    print('------------------')
    ec2_start = start_ec2_command(region, ec2_id)
    if ec2_start == True:
        msg = "EC2 \"%s\" has been start as scheduled" % ec2_id
    else:
        msg = "I try to start EC2 \"%s\" but something go wrong, sorry :( " % ec2_id

    # send discord message
    channel_id = client.get_channel(str(channel_id_number))
    await client.send_message(channel_id, msg, tts = True)
    await client.close()

def lambda_handler(event, context):
    # Run Discord client
    client.run(TOKEN)
    return True
2.4. Test
Save lại và Test function lambda trên
Function sẽ chạy trong 10s rồi return true.
Vào Discord để check tin nhắn như hình là ok:
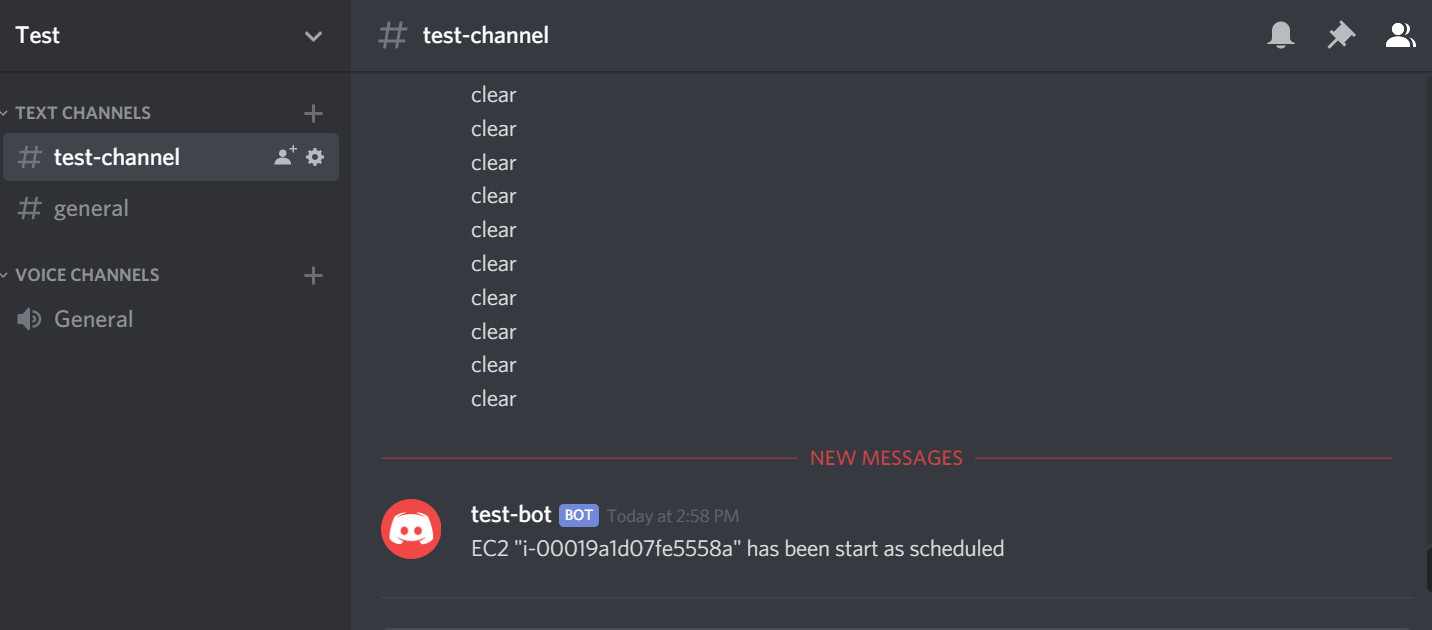
Done!
Đến đây các bạn có thể kết hợp Cloudwatch Rule để set trigger function lambda này bất cứ khi nào bạn muốn, kết quả sẽ được trả về discord.
Sẽ có rất nhiều ý tưởng dựa vào những sự kết hợp khác nhau, tùy khả năng sáng tạo mỗi người 😂
II. Slack
Để gửi message lên Slack thì đơn giản hơn Discord nhiều, các bạn chỉ cần add Incoming Webhook vào, gửi message đến Webhook đó là được
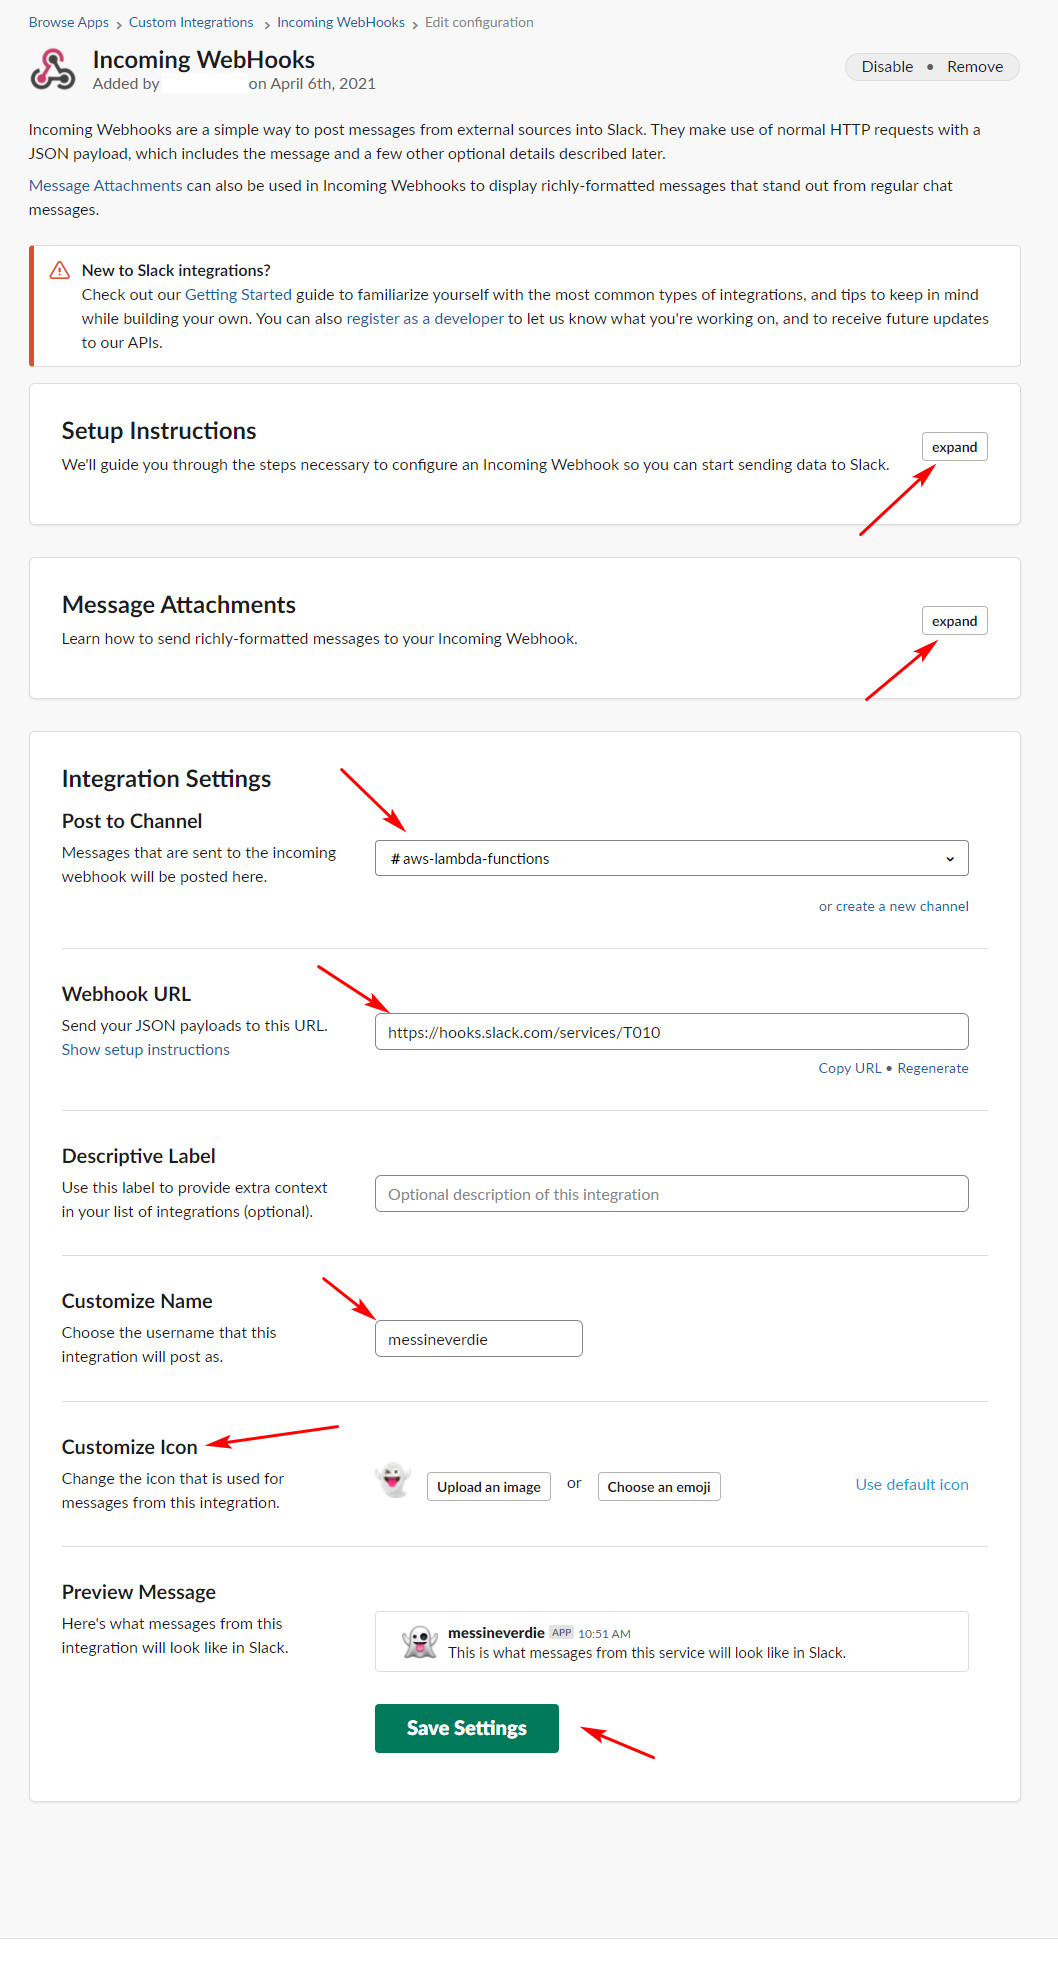
1. Install Incoming WebHooks plugin into your slack.
Goto App Directory > Search Incoming WebHooks.
Click on Incoming WebHooks.
Click on Add to Slack.
Configure Incoming WebHooks như hình sau.
2. Tạo AWS Lambda Function
Vào AWS Lambda, tạo function test-send-msg-to-slack
Chú ý chọn python >= 3.6 nhé
Nội dung function như sau: (Chú ý bạn cần sửa url)
import boto3
import time
import urllib3, json
from botocore.vendored import requests

http = urllib3.PoolManager()

url = "https://hooks.slack.com/services/T0????D1B/B0?????CS/mHtL3PAM????????LTi"
payload={"text": "This is a line of text in a channel.\nAnd this is another line of text."}


def lambda_handler(event, context):
    response = http.request('POST',
                        url,
                        body = json.dumps(payload),
                        headers = {'Content-Type': 'application/json'},
                        retries = False)

    return "Sent message to Slack!"
3. Test
Bây giờ các bạn có thể run thử function Lambda và check xem channel đã có tin nhắn hay chưa nhé.